As promised, I would like to share how I covered my
old well-loved books to give my bookcase a cleaner and more uniform look. (Read all about the make over
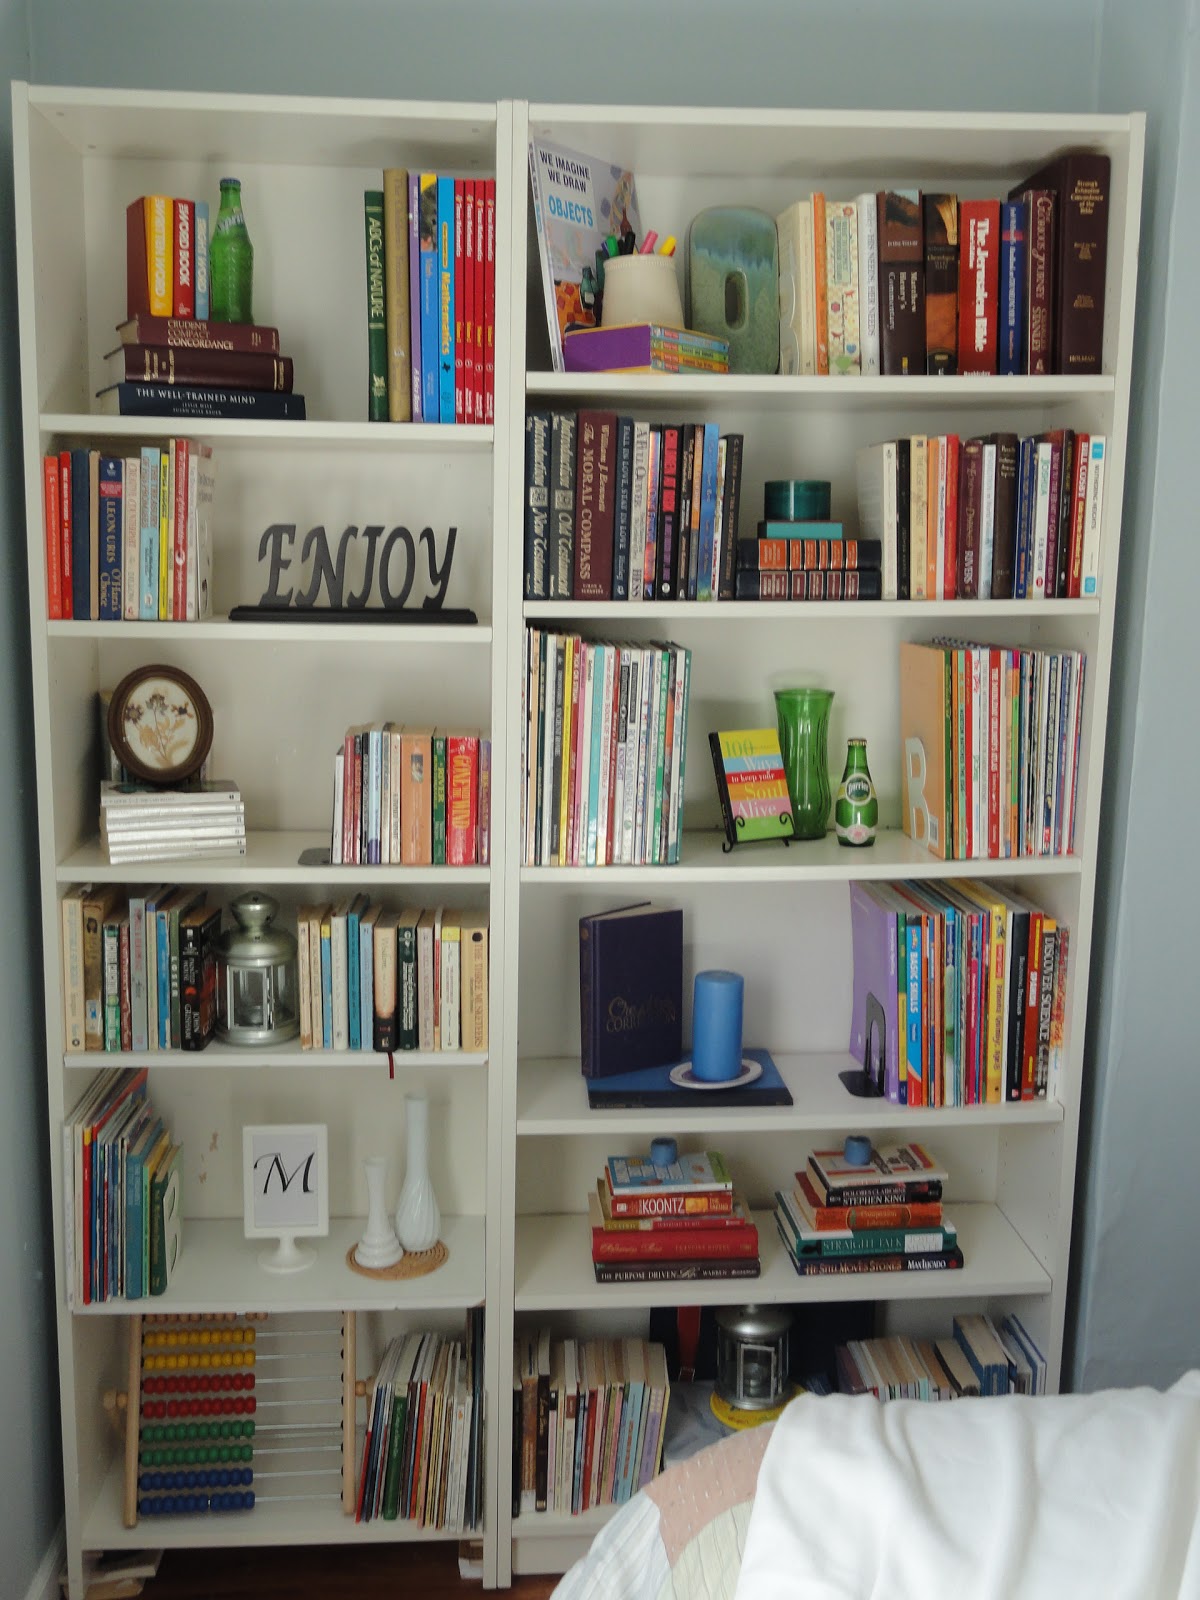
here.) Covering the books helped transform my bookcase, taking it from "far too busy and colorful for a bedroom":
to "cool, crisp, simple, clean, and bright":
Before we jump into the tutorial of how I covered my books though, I'd like to share some information with you so that you can better explore what options you have when it comes to covering your books. Due to our limited budget, we DIY a lot around my place, but I did a little research and found
Juniper Books. They provide a variety of services, one of which is custom printing book jackets. If this is something your budget allows, you might want to check them out. They do not have pricing on their site, but they give quotes over the phone. Here is an example of what they can do:
Although we chose to cover our books in white paper, we did explore numerous options and found a few inspiration pictures along the way.
Brown paper covered books:
There are also many other decorative options that we forwent because of the impracticality of the books not having visible printed titles. These, I feel, are great options if you are using the books soley for decorative purposes.
Burlap covered books:
Fabric covered books:
Gift Wrap Paper, ScrapBooking Paper, or Craft Paper covered books:
Graphical Images Book Jackets:
Vintage Maps book covers:
I hope the above pictures have inspired you to think outside the box when it comes to books and how to cover them. Now, onto how I covered my own books. Here is the tutorial.
A Step-By-Step Guide to Covering Your Books
For the purposes of this tutorial, before I begin delineating the steps, I'd like to explain the different measurement terms I'll be using. For measuring, I strongly suggest you use a tape measure or measuring tape which is a flexible form of ruler.
The height of the book is measured vertically from top to bottom.
The
circumference length is measured horizontally by wrapping the tape measure around the book, from the front edge of the cover to the back edge.
DO NOT MEASURE THE
CIRCUMFERENCE LENGTH OF THE BOOK BY LAYING IT FLAT. The measurement will not be accurate if you do so.
The
length is measured horizontally from one edge of the book face to the other.
Supplies:
White paper (see step 2 for details)
Scissors
Tape
Tape measure/ measuring tape
Printer
Microsoft Office (or other word processing program)
Instructions:
Step 1: Divide and conquer. Sort the books, grouping them by size, putting all the books of the exact same
height together. Any book that has a nonstandard height put aside in an "odd size" pile to be measured and cut individually later.
Step 2 - Choosing the Right Size Paper. The next big thing you have to focus on is the paper you will use to cover the books. There are a few things you must consider. First of all, what is the
height and
circumference width of your largest book? Add 3" to your measured circumference width to allow for the folding in of the paper that will keep the cover in place. When the paper is in the horizontal or landscape orientation, it must be able to wrap completely around the book with an overhang of about 1 1/2" on either side.
The standard sizes of paper sold at most office supply stores are 8 1/2" x 11", 8 1/2" x 14", and 11" x 17". If the largest book you will be covering is 8 1/2" or less in height and has a circumference width of less than 12", you will not be needing the 11" x 17" paper. If the largest book you will be covering is 8 1/2" or less in height and has a circumference width of less than 9", you will not be needing the 8 1/2" x 14" paper. However, it is most likely that you will have books that require the 11" x 17" paper.
Remember, before you run out and buy paper, check to see what size paper you already own and see if you can work with what you have. It just so happens that I had a huge stack of paper that had been given to us years ago, 11''x15" fanfold sheets (attached to one another and separated by serrated edge) with sprocket holes on both sides. Because it's always better (and cheaper) to work with what you've got, I used this paper for the majority of the books (some were small enough to be covered by regular 8 1/2" x 11" sheets) and cut/trimmed as needed for the various book sizes. The fact that the sheets were attached to one another actually worked well for me because I had a few books that were so large, that the 11" x 15" paper was not enough to cover them. When the books were too large and one sheet wasn't enough, I could use two sheets without having to tape them together.

I know you all don't have a stack of fanfold paper like I do, (and sprocket feed paper? it's been over a decade since I've seen that used) and this means, if you have books that are too large for the 11" x 17" paper, you will need to resort to taping two sheets of paper together or maybe you could use white butcher paper and cut it to size.
Step 3 - Making the Book Jackets This is the step in which you will begin making the book jackets. I'd like to point out that the method that I employed creates jackets that do not cover the top and bottom edges of the book. (as seen below)
Here's a diagram of the type of jacket I made:
I don't feel that the book edges take away for the overall clean look of the display but if you prefer the top and bottom edges covered, you would need a cover as the one diagrammed below:
Choose the group of like-sized books you would like to begin with and determine which size paper will be needed to cover those books. If the paper is exactly the same height of the book, when in the horizontal or landscape orientation, you will not need to do any cutting or trimming.
If the height of the paper is more than the height of the book you will need to cut it.
This is where dividing the books by size saves you lots of time and energy. I cut multiple covers at one time, as many sheet of paper as my scissors could manage to cut at one time. If you have a paper cutter, even better. To avoid measuring each sheet individually and having to use the tape measure, I got a stack of about 5 sheets (which is the number of sheets of paper my scissors can cut at one time) and I placed one of the books on top of the sheet of paper, the bottom edge of the book lining up with the bottom of the paper. I then folded the excess paper from the top upward, making a crease that would mark the exact height of the book.
I then folded the papers at the crease.
Finally, I cut the sheets of paper along the crease.
I repeated the above steps till I had the number of sheets of paper that I would need to cover all the books of the first group.
Step 4 - Printing the Titles. I’d like to begin this section by saying that I have a very small, cheap-o printer that cost me $9.95 on sale at Microcenter. It only fits sheets of paper that are 8 3/4” wide. I sincerely hope that you have a magnificent printer that can be fed 11” x 17” paper, but if you don’t, do not fret because I was able to pull this project off with my little cheap-o champion.
First, I’ll share how I printed the book titles on the book covers that did fit in my printer (8 ¾” or less in height). Then, I’ll share how I managed to put printed labels on the books that used sheets of paper that were too large for my printer.
Take the sheets of paper you’ve already cut to size and place them in your printer.
Open up your word processing system. I used Microsoft Office Word 2007. Be sure to leave your page orientation on portrait. Go to “Page Layout” and click on “Size”. Then scroll down to "More Page Sizes".
When the "Page Setup" window opens, write in the width and height of the page you will be using. Keep in mind, the word processor is viewing this page with a portrait or vertical orientation, so when it asks for the “height” you will not be putting the height of the book, you’ll be putting the height of the page when turned vertically. In my example below, my page size is 7” width by 14” height.
Once you’ve put the page size, you will need to bring your blinking cursor down to the center of the page. (Half of the page “height” measurement you inputted) Using my example of a 7” x 14” page size, I’d bring my cursor down 7”. (I actually let the bottom of my letters sit on the 7” mark) Don’t forget to account for the top and bottom margin. I find it easier to eliminate the top and bottom margins altogether.
After moving the cursor to the middle of the page, center your text and choose the font of your choice. I chose Bradley Hand ITC in bold. Choose the font size in proportion to each book’s spine width.
That’s it! Just type the title of the first book and hit print!
If you have a small printer like mine, read on to learn how to print book titles for the larger books. If you own a printer that can print on larger size paper, skip to step 5.
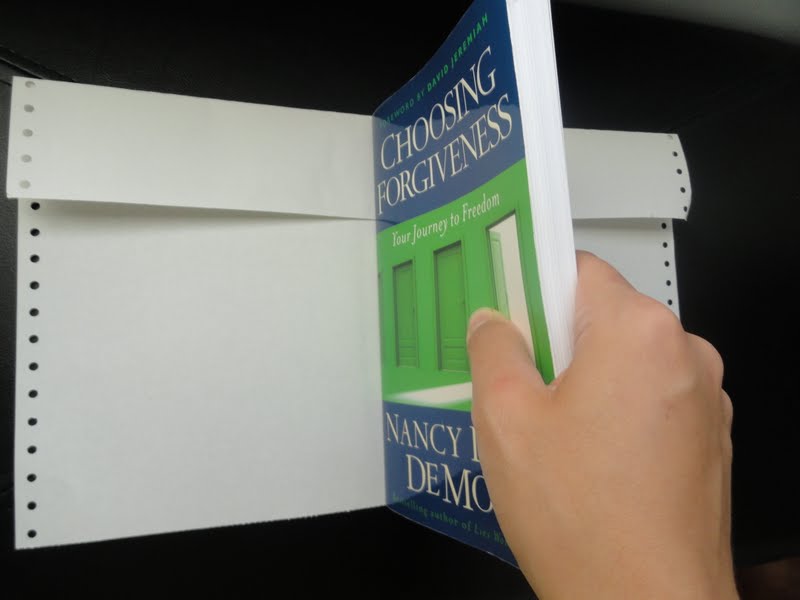
Now, I’d like to share how I managed to put printed labels on the books that used sheets of paper that were too large for my printer. Here it is folks, the larger books got this treatment.
Yep, I had to cover the book with one sheet of paper, then print the title on a separate sheet of paper and tape it over the first cover. I had to do this for all books that were greater than 8 ¾” in height. I know, a little extra time spent, but I was willing to do this in order to work with what I had and save some money. If you have a small printer and want to avoid the hassle of covering the book and then printing the title on a separate sheet, you have the option of going to a nearby print shop (Kinko’s, Office Depot, Staples, etc) where they are able to print on the larger paper. If you’d rather save a few bucks and go with my “less than spectacular but get’s the job done cheap” method, it’s quite simple to do.
First, follow steps 1-3 which tell you how to choose and cut the paper for the book jacket. Instead of moving to step 4, which is printing the book title, simple cover your book with the “no printed title” paper. You will be printing your title on a separate 8 ½” x 11” sheet of paper. Put 8 ½” x 11” paper in the printer.
On your word processing program, change the orientation to Landscape.
Now, I don’t want to lose you here so read carefully. Although you are going to use 8 ½” x 11” size paper, you are going to go to “Page Layout”, “Size”, “More Paper Sizes” and in the “page width” box you’re are going to insert the measurement of the height of your book. (Remember, the height is measured vertically from top to bottom. Refer back to the measurement terms above.) The height will remain at 8 ½”. In the example below my book is 10” in height. (Hence the reason it didn’t fit in my printer.)
Once you’ve put the page size, you will need to bring your blinking cursor down to the center of the page. For these print outs the center will always be 4 ¼” from the top because the height always remains at 8 ½”.
That’s it! Just type the title of the first book and hit print!
Step 5 - Covering your book. Good news! All the hard work has been done. :) Now, just take your printed book cover, wrap it around your book, and fold in the flaps. I did not tape my flaps, but you might choose to do so they can stay in place better.
For those of you with a small printer, that are printing the titles for the larger books on a separate 8 ½” x 11” paper, simply take your already covered book and place the second page that has the title printed on it and place it over the existing cover with the title showing on the spine of the book. Tape the second sheet onto the cover. (Refer to the second part of step 4 if unsure)
Your done! Well, almost. Now, just repeat the above 5 steps with every group of like-sized books until all the books are covered.
Remember to pace yourself. You will not be completeing this project in a few hours. I worked on mine in the evening, after my little ones were in bed, while watching some of my favorite shows. The end result was everything that I expected and more. Good Luck!
Would you like to know how I textured the wooden letter below with rolled up book pages?
Check out the tutorial
here!
Please feel free to ask any questions. I'd love to help in any way that I can. I know this is a very long and detailed tutorial, but I really want to make tackling this project as easy for you as possible.
To check out all the amazing blog parties I've joined, click here!