Thursday, June 23, 2011

How To Texture A Wooden Letter Using Rolled Up Book Pages

As promised in my last post, I'd like to share the tutorial of how I textured a wooden letter "M" using the pages of a book, as seen on my newly revamped bedroom bookcase.


As much as I'd like to take credit for coming up with this brilliant and creative idea, I was actually inspired to do this project by Katie over at Little Things Bring Smiles.   I've had her tutorial of this very project on my side bar for months now because I love it so much.  Check out her blog for many other great ideas.  I followed her tutorial pretty closely, only changing a few things to better suit my preference.  I'll be sharing my slightly different way of doing the same project with you today.

How to Texture a Wooden Letter Using Rolled Up Book Pages:

You will need the following items:

1- The  letter or letters of your choice.  I chose the letter M because it is the first letter of our last name. The letters can be purchased at most craft stores.  Mine was purchased at A.C. Moore.


2-A chapter book with no pictures that  you no longer want (Be sure the pages of the book are the color you wish to use on your letter.  If you do not own such a book, a thrift store is a great place to find one.)

3. Scissors

4. Hot glue gun and glue refills


Instructions:

1-  After collecting all the necessary items,  be sure to connect your hot glue gun so that it will be ready to go.

2.  Begin by tearing the pages out of the book you'll be using.  Just to give you an idea of how many pages you'll need, I used about 60 pages for me letter.


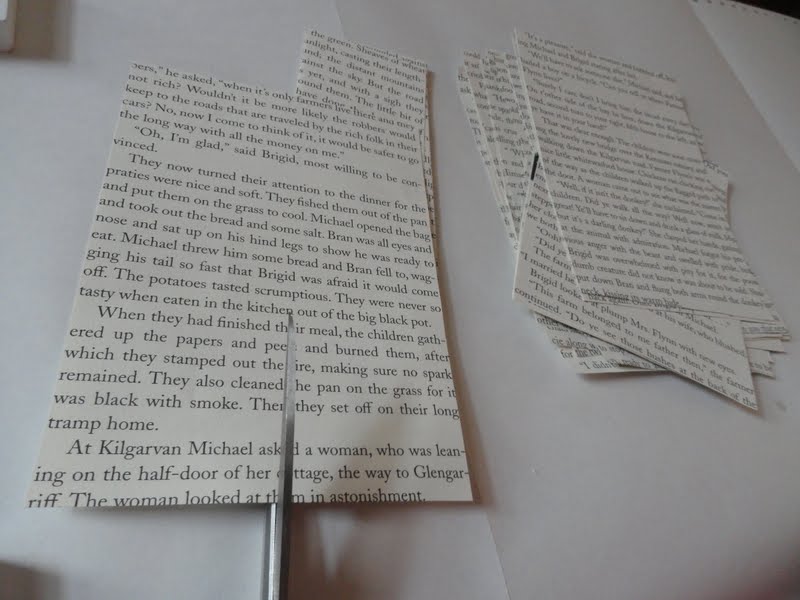
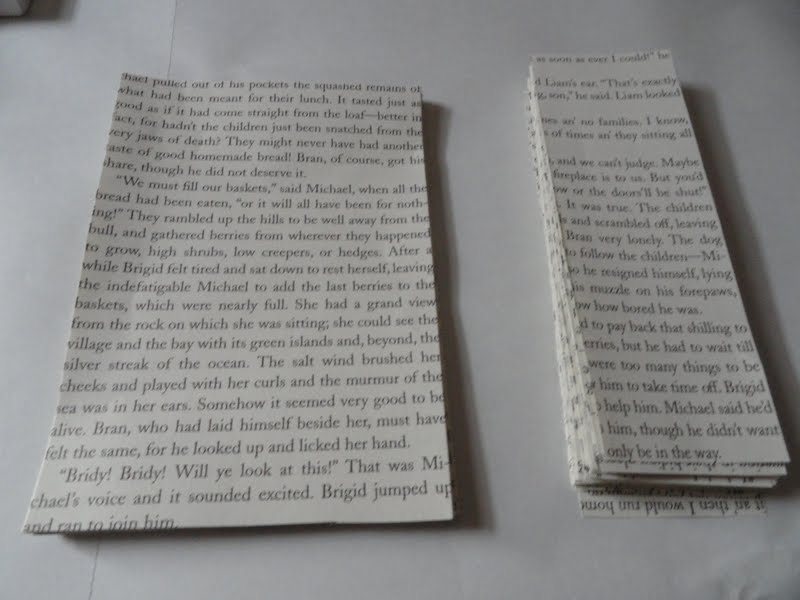
3.  After all the pages are torn out, use the scissors to cut the margins off the pages, leaving only the text.


4. Cut a handful of the pages in half (for the narrower parts of the letter) and leave the rest as full sized sheets.


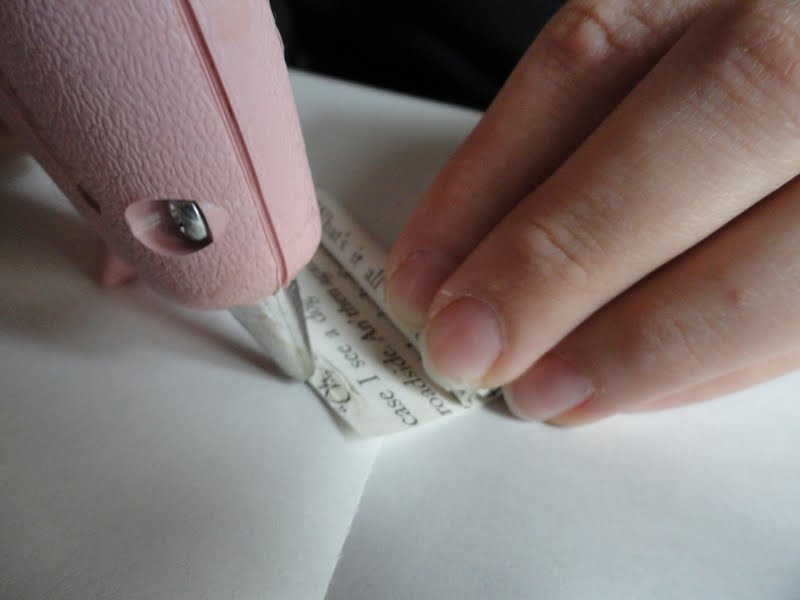
5. Begin rolling up the sheets of paper.  I rolled mine up tightly because I preferred the look of many small rolls of paper as opposed to fewer large rolls, but this is completely up to you.  When you near the end of the roll, leave a 1/2 inch overhang and apply hot glue to the inner edge and then finish rolling up the paper,


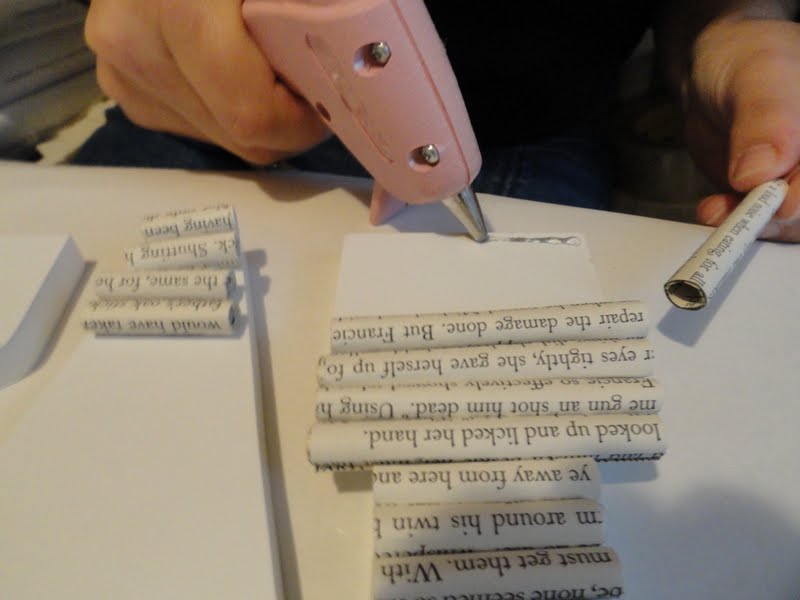
6. Using the roll of paper I'd already made, I roughly calculated how many rolls I would need and I made a
handful of paper rolls before I began applying any of them to the letter.  I just felt the project would move quicker this way. When you've made a good bundle of paper rolls, choose whether you will cover the letter from top to bottom or from bottom to top, (I did it from bottom to top) and place the first roll at your starting point.

7.  Using the letter as a guideline, cut the roll of paper to match the exact width of the area you are covering.
(In the picture below I am simply demonstrating how to cut the roll of paper to size so it's not placed at my starting point)


8.  Glue the roll of paper to the letter. Because mine was a symmetrical letter and I wanted both sides to match, I alternated sides, gluing a roll of paper on one side, then the other and so on.


9.  Repeat steps 6-7 with each roll of paper you already have.  I glued the rolls of paper together tightly because I liked the way it looked that way.  Again, a matter  of preference.


10.  When you run out of the rolls of paper you've made, begin making more, repeating all above steps until the letter is covered. For the symmetrical letters, be sure the rolls of paper on both sides of the letter match up.


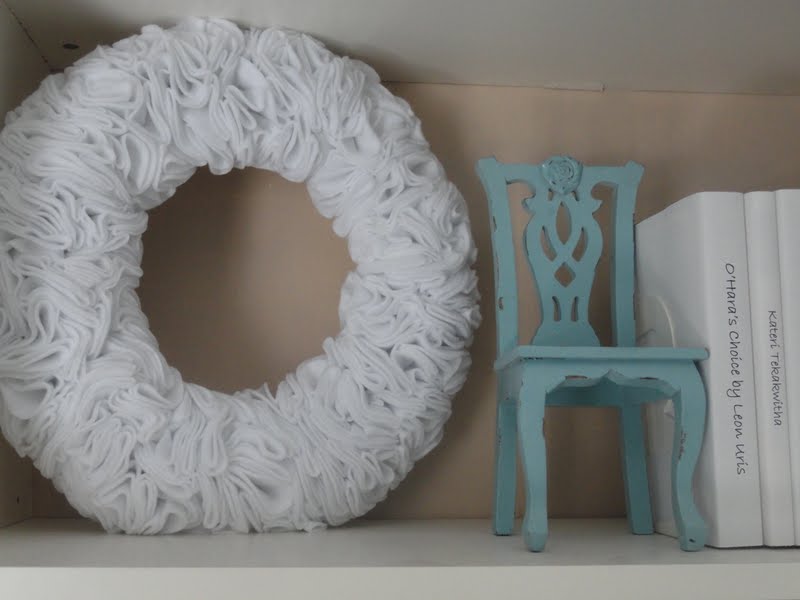
Got any questions?  Feel free to ask.  I'd love to help in any way I can.  Stay tuned for a tutorial on how to make this felt wreath.


Party with me HERE!

Monday, June 20, 2011

Don't Judge a Book By Its Cover

The truth is, we all do it.  We take one look at something or someone and form an opinion, be it negative or positive, based solely on what we see.  Although used by all, this method of selection is quite flawed, and because of it many have overlooked treasures of incalculable worth. Like gold nuggets in the mud,  beauty is often hidden beneath a cloak of unsightliness.  It happened to me when I approached a dirty sunburned homeless man, expecting slurred speech and irrational thoughts.  To my surprise,  I found a soft-spoken and articulate intellectual.  It happened to me when I pulled into the littered and unkempt parking lot of a dingy shack, displaying a faded crooked sign that read “Ant qu s”.   I almost left, but opted to stay, expecting to find a rusty foul-smelling collection of junk.  Instead, I found an orderly display of priceless heirlooms.  Take my torn and tattered collection of old books, for example.  At first glance and to the untrained eye, they appear to be of no worth at all.  The pages are yellow, the bindings and covers torn and creased, but it’s in the skillfully worded sentences and paragraphs that their true value lies; stories so beautifully told you can almost taste, smell, and see every detail.  Although space is limited in our home, the books are simply too precious for us to discard. As you can see in the picture below, some of them are in very poor condition. All six of these books I've kept since my childhood and I cannot express what a thrill it has been for me to read them aloud to my own children. 


Because these books are so near and dear to my heart,  I did not want to stash them away somewhere or hide them behind cabinet doors.   I wanted to display them in a way that would reflect their importance and also our family's passion and love for reading.  The bookcase we chose to tackle first was the one in our bedroom, since that is the room we've been working on completing for a while now.  This bookcase has all the children's chapter books,  my husbands resource/study books, and the majority of my books.  Here is the bookcase as it looked before we began our makeover. (all the picture books were moved to the kids' room) If you have not already done so, I’d like to invite you to read a previous post, “Confessions of a Bookworm”, so you can better understand the following project. 


After looking at countless inspiration pictures of artfully displayed books and tastefully arranged bookcases, we were pretty sure we knew what we wanted.  Here are two of the images that most inspired me. Source: Southern Living


We began our bookcase makeover by removing all the books and knickknacks, focusing our attention on the bookcase itself. (Actually two bookcases joined to become one)  These Ikea bookcases were handed down to me by my sister (check out her blog The Pear Tree Cottage here).  They were taken apart and stored in my  garage in Texas for a while before we moved, then transported 1,600 miles to New Jersey in a tightly packed Uhaul truck. They were in serious need of some TLC.


The particle board backing, which was suppose to be nailed with small nails to the middle shelf, had been nailed so many times it would no longer hold up.  Not only did it not hold up, but the numerous attempts to nail it had left unsightly holes.


We gave up on the nails altogether, aligned the boards, and used a staple gun to secure the backing instead.  After the backing was secured we used caulk to cover the holes left behind by the numerous nailing attempts.


Once the backing was secured and the holes sealed,  we were ready to choose a paint color for the inside/back of the bookcase.  A sandy tan that would match our bedding and pillows was what we had in mind.  We purchased a paint sample at Home Depot (the lighter color in the pic below) and painted a few strokes on the bookcase, along with the color we used in our kitchen, to see which one we felt would look the best.  The lighter color was unanimously voted upon.


Once we were finished with the bookcase itself, we were able to move on to the books. As I mentioned in this post, one of the things we wanted to change was how colorful and busy the bookcase looked. In our bedroom, we are going for what I call a cool and crisp look. Simple, clean, and bright.  It was clear to us that the rainbow effect created by the colorful book bindings was making it impossible for us to achieve this overall look.  Add to that the less than appealing appearance of some of the books and we had a real challenge on our hands.

After much discussion and deliberation, a rather unorthodox solution was decided upon.  We would cover all the books, making our own book covers with white paper and printing the titles on the binding.


Although I immediately got giddy with excitement at the thought of how amazing the bookcase would look, the task of covering each book was rather daunting.  I decided not to ponder too much the amount of work and time the project would take, knowing that if I did, I might be too intimidated to begin. I just jumped right into the chaos and I have not regretted it. (I'll soon be sharing a detailed step-by-step tutorial on how I completed this project)

After the books were covered, we were able to move on to the fun part, collecting and arranging the accent pieces that would be displayed along with the books.  This being our bedroom, we wanted a few pieces that would tell a story about our relationship and our family.   I also wanted to include a few DIY crafts I'd worked on to give the bookcase that personalized and unique feel.  Due to our restricted budget, the majority of the items were purchased secondhand at a nearby thrift store. So, without further ado, before and after pics of our new and improve bookcase!

The "too busy and too colorful" BEFORE


The "cool, crisp, clean, simple, and bright" AFTER


BEFORE


AFTER


BEFORE


AFTER


You may notice that the books are not very evenly distributed, that the bottom shelves have more books than the top shelves.  The thing is, I like the way the shelves look when they are not overly crowded with books, but we have a lot of books  Due to the layout of our room, the bottom shelves can only be seen if you stand right in front of the window, so I decided early on that I wanted the bulk of the books to go on the bottom shelves.

Now for a quick shelf by shelf breakdown.  

Top two shelves on the left:  Plant pot Valentine's Day gift from hubby purchased at HomeGoodsHouse plant HomeDepot $3.99, Picture frame IkeaVirserum Frame $2.99, Picture inside the frame post card of Cancun, Mexico from our honeymoonWoven tray thrift store find $1.41Wooden number 14 commemorating the day we became boyfriend and girlfriend March 14, 1996 read our love story here -craft store purchase $.49 each.


 Top two shelves on the right:  Felt wreath made by me- tutorial to come soon $10, Wooden chair JoAnn's $7.99, Wooden "Shaker Seed Co." sign thrift store $.99, Glass bottle thrift store $.69, Candles  Ikea Jubla candles left over from previous projectTin bucket Target $.99.


 Third shelf on the right:  Glass Bottle thrift store $1.41, Candle gift, Wooden tray thrift store $1.61


Third shelf on the left:  Lantern garage sale 1.50, Book bracket thrift store $.99Basket weave coaster gift


 Forth self on the right side:  Letter M craft store $1.99 with added texture by me tutorial soon to comePicture frame Ribba from Ikea $19.99, Print inside frame printed on our computer, MapQuest map with highlighted path from Houston (where my hubby lived while we were dating) to Fort Worth (where I lived). We had a long distance relationship and this 4 hour trip was much traveled by the two of us, Plant and Pot Ikea $5, Crystal candle holder wedding gift, Candle already owned.


Fifth shelf on the right:  Round frame with real pressed flowers thrift store already owned for many years.


Fourth Shelf on the left:  Tray with number 3 for our three children tray purchased at thrift store and then transformed by me, tutorial to come soon tray $1.61 number $1.99 paint, $2.94, Shell  from this trip down the shore on Mother's Day.


 Fifth shelf on left side:  Tin Pail thrift store $.99, Ivy Plants HomeDepot $4 for both


Bottom Shelf on both sides: Wooden box containing a few of our love letters, thrift store $.99 design painted by me, Letter "O" not pictured HomeGoods $3.99

Overview of Complete Bookcase Transformation Costs:
Accent Pieces- $79.03
Bookcovers - free (used paper that was given to us)
Paint sample used to paint bookcase backing: $2.94
Paint sample used to paint tray and numbers: $2.94
_______________________________________________
Total Spent:  $84.91  (Jump for Joy!)


You might have also noticed that we hung a framed chalkboard on the column next to the bookcase.  This is something I've dreamt of having in our bedroom for a long time; a place where my honey and I can leave each other notes of love and encouragement. What woman would not want to wake up to this sweet note from her man? (made using this old mirror and chalkboard paint)


 One last look for your viewing pleasure.


If you like the covered books and wish to tackle this kind of project in your own home, I've written up a very detailed step-by-step tutorial on how I accomplished this tedious and time consuming, yet exceedingly rewarding task.  Check out that tutorial HERE.

Interested in knowing how to texture a wooden letter with rolled up book pages, like the letter "M" below?  Check out a detailed tutorial HERE.


Want to know how this tray went from looking like this:


to looking like this?


Tutorial Coming Soon

And lastly, would you like to know how I used these materials...


to make this wreath?


I'll be sharing this tutorial soon.  If you'd like to be notified immediately when I post, simply scroll on over to the side bar and follow this blog.  I'd be honored to have you.

I'll leave you now with this quote by Roald Dahl (author of Charlie and the Chocolate Factory, Matilda, James and the Giant Peach, and many other amazing children's books)

 "Please, oh please, we beg, we pray, go throw your TV set away, and in its place you can install, a lovely bookcase on the wall."    -Roald Dahl


To check out all the amazing blog parties I've joined,  click here.


The Lettered Cottage